Home > Resin System > Injection Anchor Adhesive
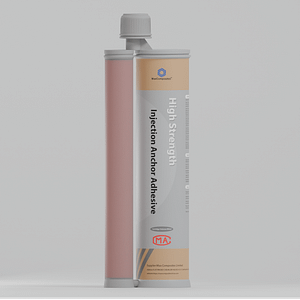
Injection Anchor Adhesive
High-Performance Rebar Anchoring Adhesive
Advanced Structural Bonding Solutions for Heavy-Duty Anchoring
Our Rebar Anchoring Adhesive is a premium-grade, two-component epoxy resin system engineered for high-load structural applications. Designed to deliver exceptional bond strength, it seamlessly anchors post-installed rebars and threaded rods into concrete and other solid substrates, ensuring maximum structural integrity.
Key Applications
Our anchoring adhesive is versatile and widely certified for critical structural reinforcement in infrastructure, commercial, and residential projects:
- Structural Retrofitting & Extension: Connecting new concrete slabs, beams, columns, and walls to existing structures.
- Rebar Doweling: Post-installed rebar connections for structural alterations or reinforcement.
- Heavy Machinery Installation: Anchoring heavy equipment, industrial cranes, and vibratory machinery.
- Infrastructure Projects: Securing highway noise barriers, guardrails, bridge expansion joints, and railway tracks.
- Steel Structure Connection: Fixing steel columns, brackets, and facades to concrete bases
Product Features
- Extreme Load Capacity: Provides superior bond strength that outperforms the tensile strength of the concrete substrate itself.
- Seismic & Dynamic Resistance: Formulated to withstand heavy dynamic, seismic, and fatigue loads.
- Styrene-Free & Low Odor: Environmentally friendly and safe for indoor use or confined spaces.
- Excellent Environmental Tolerance: Highly resistant to water, acids, alkalis, aging, and chemical corrosion.
- Sag-Resistant Formula: Ideal for overhead and horizontal installations without dripping.
- High Moisture Tolerance: Demonstrates reliable curing performance even in damp holes or humid environments.
Installation Guide
Pro Tip: Proper hole preparation is critical. Over 80% of anchoring failures are caused by inadequate cleaning.
- Drill: Drill the hole to the specified diameter and depth using a rotary hammer drill.
- Blow & Brush: Use an air pump or compressed air to blow out dust, brush the hole thoroughly with a steel wire brush, and blow out dust again (repeat at least 3 times until no dust remains).
- Prep the Cartridge: Insert the cartridge into the caulking gun. Dispense the initial trigger pulls until the two components are mixed to a uniform color in the static mixer (discard the unmixed initial portion).
- Inject: Inject the adhesive starting from the bottom of the hole, gradually withdrawing the mixer. Fill the hole approximately 2/3 full to avoid excessive overflow.
- Insert: Insert the clean rebar/threaded rod into the bottom of the hole while twisting it slowly to ensure even adhesive distribution.
- Cure: Leave the anchor undisturbed during the specified gel and curing times. Do not apply any load until the adhesive is fully cured.
Important Precautions
- Hole Cleaning: Ensure the drilled hole is completely free of dust, debris, standing water, and oil before injection.
- Temperature Sensitivity: Curing time varies significantly with ambient and substrate temperatures. Refer to our Technical Data Sheet (TDS) for exact gel/cure matrices.
- Correct Mixing: Always discard the first 1-2 squeezes of adhesive to ensure the static mixer has achieved a perfect 3:1 chemical balance.
- Safety Gear: Operators must wear protective gloves, safety glasses, and appropriate work clothing during installation. In case of skin contact, wash immediately with soap and water.
- Storage: Store the product in a cool, dry, and well-ventilated area, away from direct sunlight and high temperatures (ideally between 5°C and 25°C).
Any question or need more information?